A user guide on how to view and comment on planning applications for consultees.
Introduction
Public access for consultee access is a system which allows members of consultee bodies to view details about Planning Applications as well as submitting comments.
Registration
Before you can submit comments on planning applications you will need to register. To register go to public access website and click on the “Register here” link.
1. To create a new user account click on Register in the menu bar.
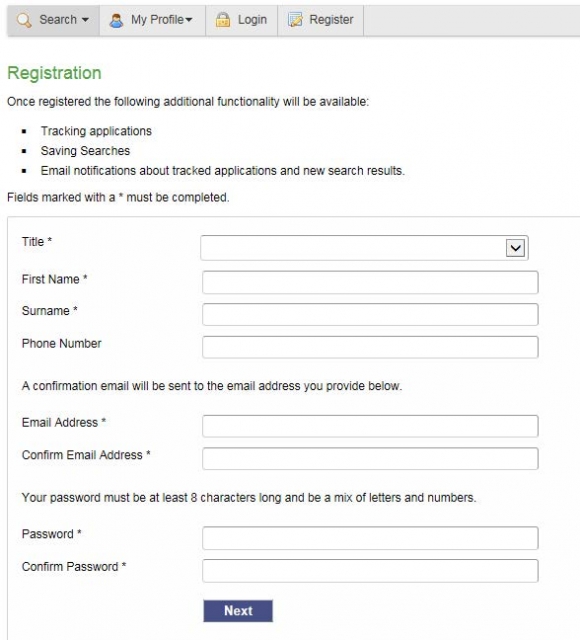
Please Note: Passwords must be eight characters or longer, must contain a mixture of letters and numbers and must not contain spaces.
An email will be sent to the address you entered. This provides final confirmation that you want to create a Public Access account. When the email arrives, click on the link to be returned to the Public Access site.

Submitting Comments on a Planning Application
You will be notified via email of each new consultation with a link to login.
Login
Enter your email address and password and click Login
Forgotten password
- If you forget your password, click on the Forgotten password? link
- Enter your email address and then enter a new password twice. Click the Change Password button.
- A confirmation email will be sent to your email address. When it arrives, click on the confirmation link. You will now be able to log in with your new password.
Consultee In Tray
As a Consultee user, you have a set of consultee pages that allow you to view new, active and past consultations for your Interest Area.
In Tray
The In Tray displays a list of applications on which requests for consultation in your interest area have been made. Each application may have one or more requests for consultation associated with it.
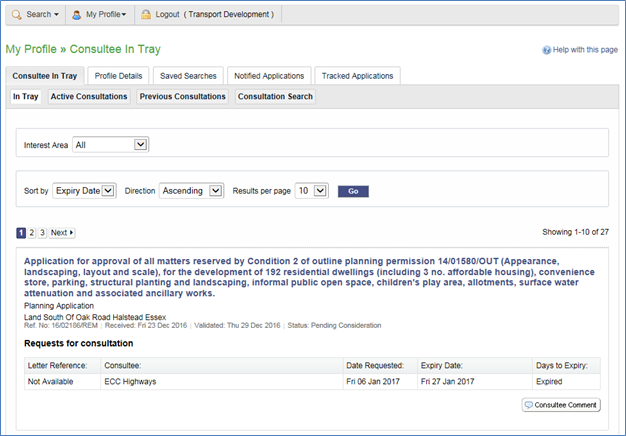
- You can choose to display applications related to one interest areas to which you belong, or to all of them. Select from the Interest Area drop down list.
- You can configure the way the list is displayed.
- To sort the results, select a criterion from the Sort by list.
- To change the direction of the listed results select Ascending or Descending from the Direction list.
- To change the number of results displayed at one time select a value from the Results per page list.
- When you have made your display selections, press Go.
- You can browse the In Tray for consultations of interest to you. If there are more results than fit on one page, use the Next and Previous buttons or go to a particular page to speed up navigation. Each request for consultation displays information appropriate to the type of application, including:
- Letter Reference - the relevant letter reference number
- Consultee - the person or body who raised the request for consultation
- Date Requested - the date the request for consultation was initiated
- Expiry Date - the date that consultee comments must be made by
- Days to Expiry - the number of days until the expiry date
- To view the details of the application click on its title (application description). You will also be able to read any public and consultee comments that have already been made.
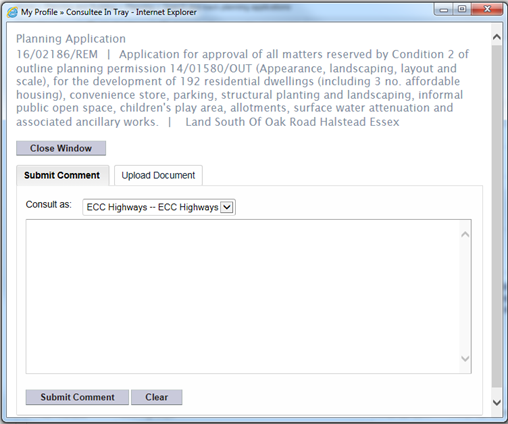
- To comment on an application click on the Consultee Comment button. You can submit a consultee comment either by typing a note directly or by uploading an existing document. You can also send a message directly to a consultee group coordinator.
- To upload a pre-prepared submission as a document, select the Upload Document tab in the pop-up window. Select the relevant interest area from the Consult as drop down list. Click on the Choose file button and navigate to the document's location on your computer or network. When you have located your document, click on the Upload button.
- Please Note: please can you ensure the document is saved as a PDF to allow the document to be viewable to all and locked so that it cannot be amended.
- To submit a comment directly, select the Submit Comment tab in the pop-up window. Select the relevant interest area from the Consult as drop down list. Type your comment into the text box. When you are finished, click on the Submit Comment button
- To send a message to consultee group coordinator (if available), select the Email Coordinator tab. Select the relevant interest area from the Consult as drop down list. Type the text of the message that you want to send then click on the Email to Group Coordinator button.
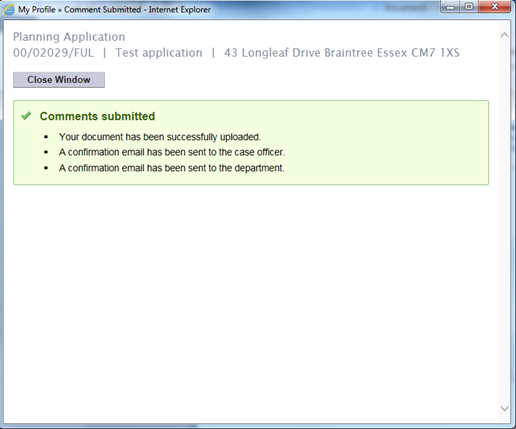
- Once you have submitted your comment, a confirmation message will confirm receipt of the comments so that you know your response has been sent.
Setting up Email Acknowledgements
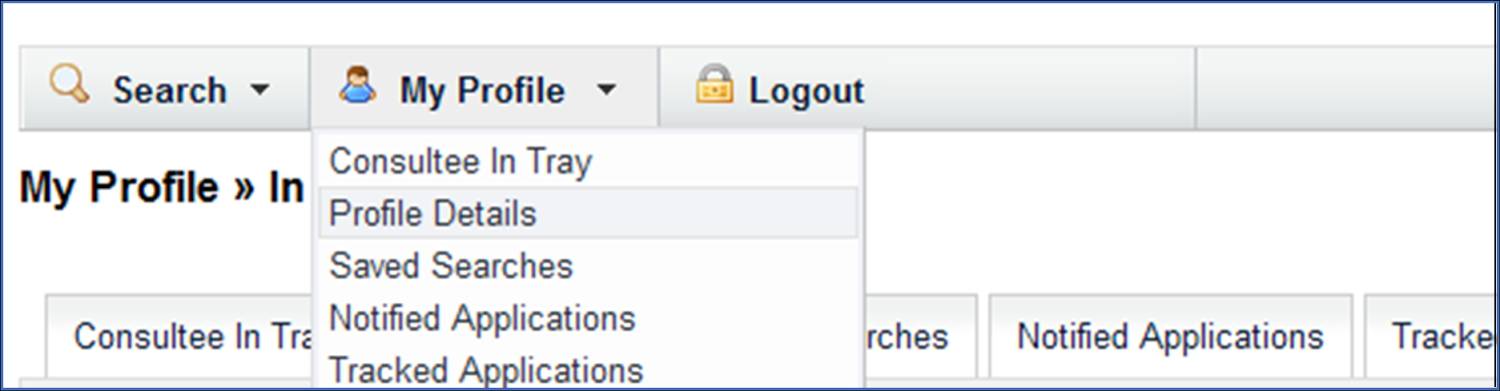
Please Note: By default you will not receive a receipt for your comments; however you can change this setting by clicking My Profile on the menu bar, followed by Profile Details.
Select In Tray Settings and tick the box labelled Email Acknowledgement.
Active Consultations
The Active Consultations page displays a list of applications currently under consultation on which you have made a consultee comment. You have until the expiry date to make any further comment. After this date they will be moved into the Previous Consultations page.
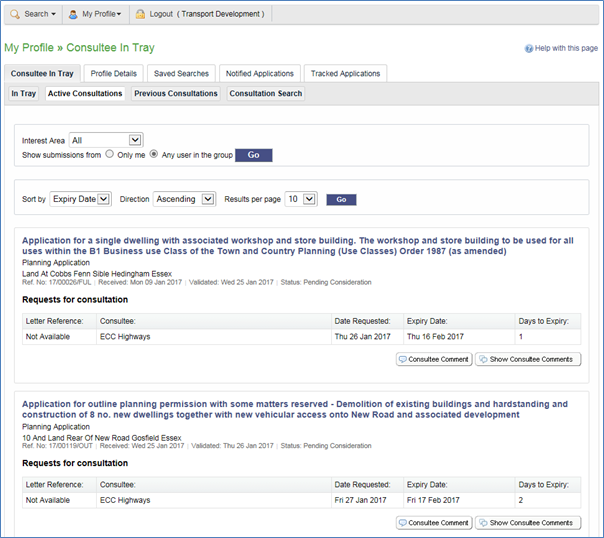
Consultee In tray overview
- You can choose to display applications related to one interest areas to which you belong, or to all of them. Select from the Interest Area drop down list.
- You can display only submissions that were made by you or submissions that were made by other members of your consultee group. Select Only me or Any user in the group, then press Go.
- You can configure the way the list is displayed.
- To sort the results, select a criterion from the Sort by list.
- To change the direction of the listed results select Ascending or Descending from the Direction list.
- To change the number of results displayed at one time select a value from the Results per page list.
- When you have made your display selections, press Go.
- You can browse for consultations of interest. If there are more results than fit on one page, use the Next and Previous buttons or go to a particular page to speed up navigation.
- Each request for consultation displays information appropriate to the type of application, including:
- Letter Reference - the relevant letter reference number
- Consultee - the person or body who raised the request for consultation
- Date Requested - the date the request for consultation was initiated
- Expiry Date - the date that consultee comments must be made by
- Days to Expiry - the number of days until the expiry date.
- Each request for consultation displays information appropriate to the type of application, including:
- To view the details of the application click on its title (application description). You will also be able to read your previous submission, and any other public and consultee comments.
- Alternatively, to go straight to the consultee comments, press Show Consultee Comments.
- To add a further comment on an application click on the Consultee Comment button. You can submit a consultee comment either by typing a note directly or by uploading an existing document.
- Please Note: Some interest groups do not permit you to make more than one comment.
- To submit a comment directly, select the Submit Comment tab in the pop-up window. Select the relevant interest area from the Consult as drop down list. Type your comment into the text box. When you are finished, click on the Submit Comment button.
- To upload a pre-prepared submission as a document, select the Upload Document tab in the pop-up window. Select the relevant interest area from the Consult as drop down list. Click on the Choose file button and navigate to the document's location on your computer or network. When you have located your document, click on the Upload button.
- To send a message to consultee group coordinator (if available), select the Email Coordinator tab. Select the relevant interest area from the Consult as drop down list. Type the text of the message that you want to send then click on the Email to Group Coordinator button.
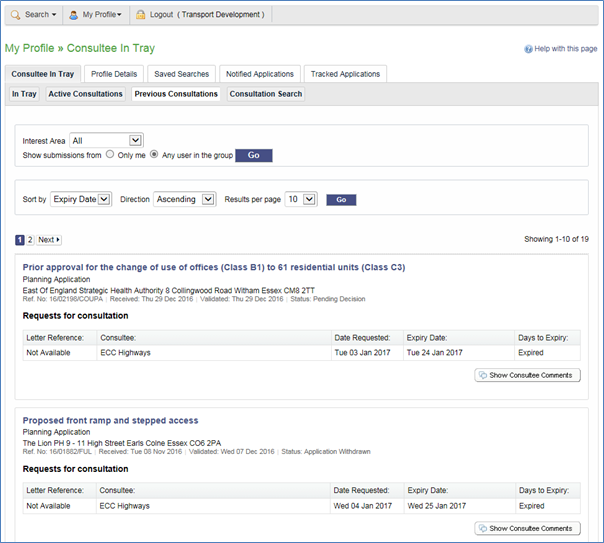
Previous Consultations
The Previous Consultations page displays a list of applications whose consultation expiry has passed on which you have made a consultee comment. These are listed here for reference purposes and will be automatically removed after 6 months.
- You can choose to display applications related to one interest areas to which you belong, or to all of them. Select from the Interest Area drop down list.
- You can display only submissions that were made by you or submissions that were made by other members of your consultee group. Select Only me or Any user in the group, then press Go.
- You can configure the way the list is displayed.
- To sort the results, select a criterion from the Sort by list.
- To change the direction of the listed results select Ascending or Descending from the Direction list.
- To change the number of results displayed at one time select a value from the Results per page list.
- When you have made your display selections, press Go.
- You can browse for consultations of interest. If there are more results than fit on one page, use the Next and Previous buttons or go to a particular page to speed up navigation.
- Each request for consultation displays information appropriate to the type of application, including:
- Letter Reference - the relevant letter reference number
- Consultee - the person or body who raised the request for consultation
- Date Requested - the date the request for consultation was initiated
- Expiry Date - the date that consultee comments must be made by
- Days to Expiry - expired
- To view the details of the application click on its title (application description). You will also be able to read your previous submission, and any other public and consultee comments.
- Alternatively, to go straight to the consultee comments, press Show Consultee Comments.
- You cannot add further consultee comments to applications in the Previous Consultations page because their consultation period has expired.
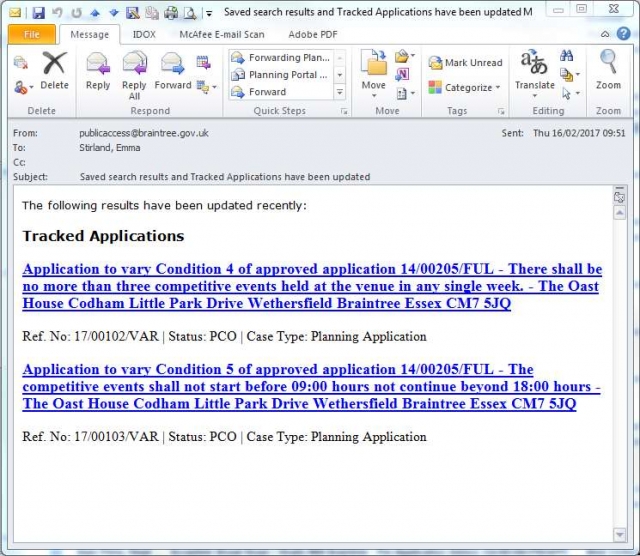
Tracking Applications
Any planning application or appeal can be “Tracked” so that you can keep up to date with its progress without having to search for it again. You will be sent an email if the status of the application is updated.
- Once you have performed a search, view the details of one of the resulting applications.
- If you want to add this to your Tracked Applications, click on the Track button.
-
-
To return to this application at a later date, select Tracked Applications under My Profile.
-
To stop tracking an application, return to the application details and click the Stop tracking this application button at the top of the page. Alternatively click the Stop Tracking button next to the application in the Tracked Applications page.
Searching
The following pages will help guide you through how to carry out searches for planning applications. There are a variety of search methods to allow you to find the information you are looking for.
- Simple - search quickly for planning applications and appeals according to some entered text
- Advanced - search according to a wide combination of relevant factors
- Weekly/monthly list - search for applications where an application is validated or decided within a particular time period
- Property - search for a particular property to which applications may apply
- Map - search using an interactive map tool.
Please Note: The online search facility will only allow searches back to approximately 1990. Applications prior to this date will need to be requested from the Planning Department, for which there may be a charge for officer time. Email planning@braintree.gov.uk for more information.
You can also save searches to either re-run when you wish or be notified by email if and when the application is updated or a new application is received. Information on this can also be found on the following pages.
Simple Search
A simple search allows you to search quickly for a planning application or appeal by entering some text that will help identify it.
- From the Search drop down list then select Simple Search.
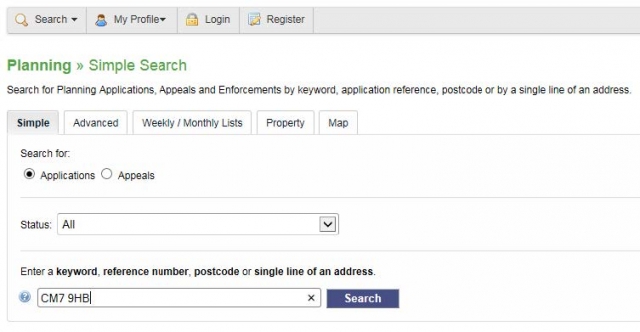
- Click to select the type of record that you want to locate.
- Choose the appropriate option from the Status drop down list.
- Enter some text in the Search box that will correspond to one of:
- reference number (for example, "16/01234/FUL")
- post code (for example, "CM7 9HB")
- part of an address (for example, "Causeway House", "Bocking End").
- Click on the Search button to display the results of your search (see “Viewing Your Search Results”).
Advanced Search
An advanced search allows you to build a complex combination of specific criteria on which to search for information.
- From the Search drop down list select Advanced Search.
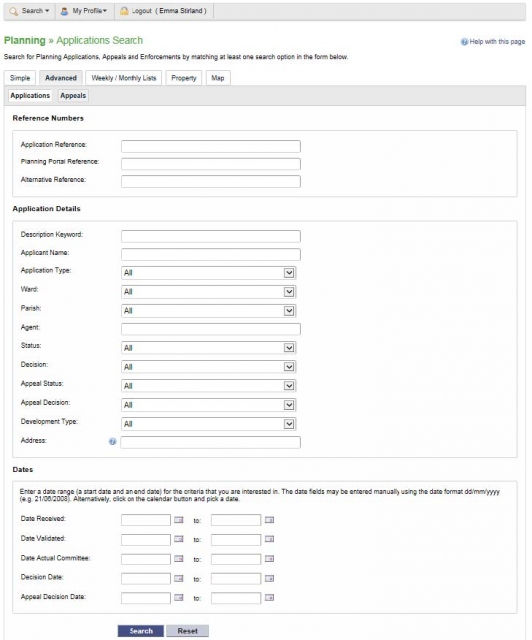
- A variety of reference numbers are associated with planning records. Enter one or more to help identify a specific record.
- Click to select the type of record that you want to locate (either from Application Type or Development Type)
- The details you can fill in depend on the record type selected. Enter the details you want to search on.
- Every planning case has a number of important dates associated with it (for example, the date the application was validated or the date that a court decision was issued). Use the date pickers to define an appropriate period to search within for any dates of interest.
- Click on the Search button to display the results of your search (see “Viewing Your Search Results”).
Weekly/Monthly Lists Search
The weekly or monthly lists feature allows you to search for applications according to the week or month in which they were validated or decided, as published in the local authority’s lists.
- From the Search drop down list select Weekly/Monthly Lists.
- Click on Weekly List or Monthly List to select which list you want to search.
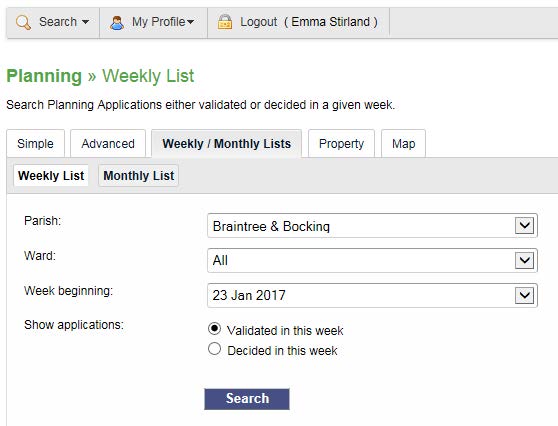
- You can narrow your search to a particular area by selecting from the Parish or Ward drop down lists.
- Specify the Week or Month by selecting from the drop down list.
- Under Show applications, select which records to display.
- Click on the Search button to display the results of your search (see “Viewing Your Search Results”).
Property Search
The property search feature allows you to search for a specific property in the gazetteer.
There are two property search options:
- Address - search for applications at a specified address
- A to Z Street - search for applications on a specified street chosen from an alphabetical list.
Address Search
1. From the Search drop down list select Property Search.
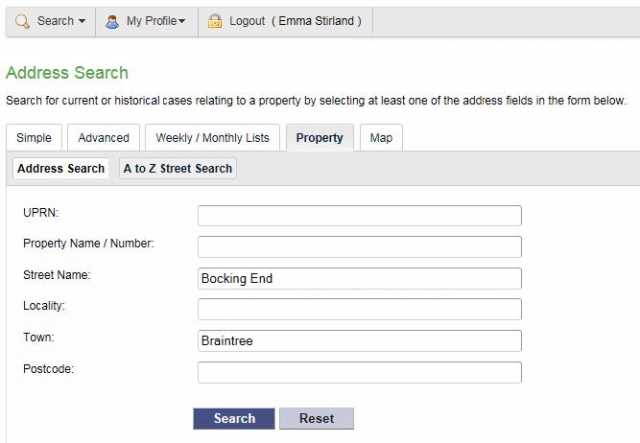
2. To search for a specific property by its address, select the Address Search tab
3. Enter as many details as you know in the appropriate fields, then press the Search button to display the results of your search (see “Viewing Your Search Results”).
4. If you need to clear the fields and start again, press the Reset button.
A to Z Street Search
1. From the Search drop down list select Property Search.
2. To search for a street alphabetically, select A to Z Street Search.
3. Click on the initial letter of the street you are interested in to display all the streets that begin with that letter.

4. Select a street from the list to display the addresses on that street, then choose an address to discover whether any planning records exist for that address.
5. To go back and chose a different street, click on the Refine Search button.
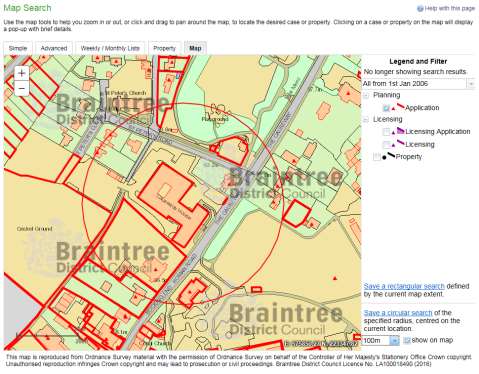
Map Search
The Map Search allows you to identify properties that are the subjects of planning applications using an interactive map. The map allows you to zoom in and examine each property to locate the records of interest to you. You can filter the display by adding or removing record types and by changing the time period.
Alternatively, if you are interested in applications relevant to a specific geographical area, such as close to your home, you can search for records limited either to the currently displayed map extent or to a specified radius from the map’s centre. These searches can be saved to your Saved Searches (see “Viewing Your Saved Searches”).
1. From the Search menu, choose the select Map Search. Please Note: The initial view shows applications submitted within the last six months.
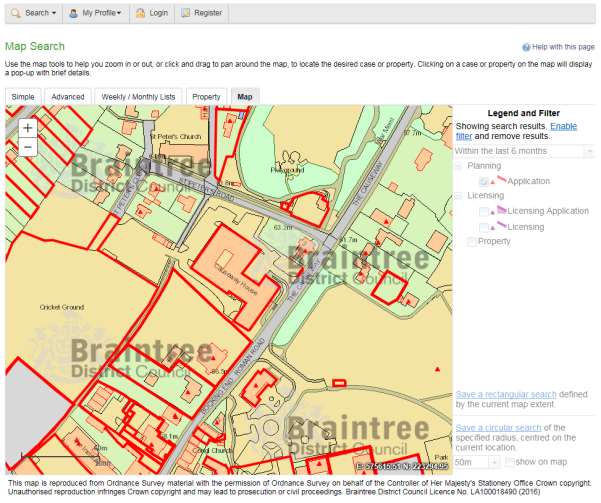
2. To zoom in on a specific location, click on a point on the map and click on the + button. To zoom out, click on the - button. Alternatively you can zoom in and out by scrolling the mouse wheel.
3. To pan the image around, click on the map and, keeping the mouse button depressed, drag in the direction you want to pan.
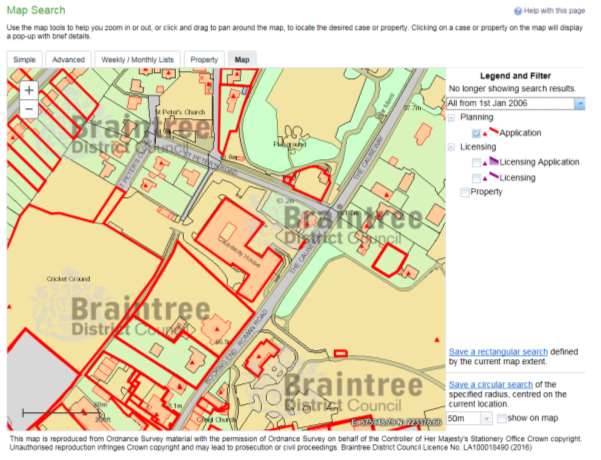
4. To refine the display, click on Enable Filter. This will allow you to change the time period from the drop down list.
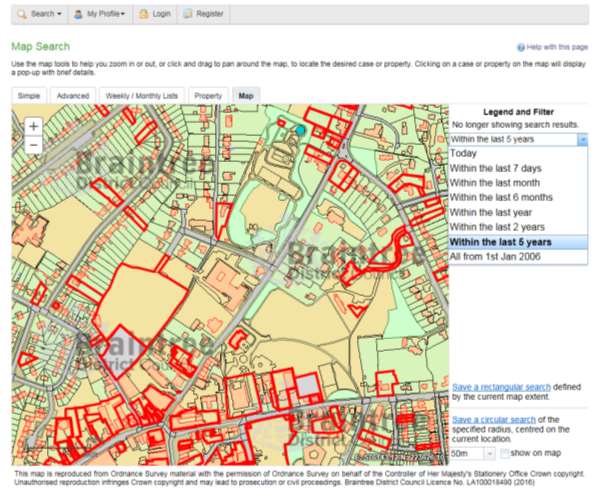
Most records can be displayed in two ways:
- Records from 2006 to current day will be displayed as a red polygon
- Records from approximately 1990 to 2005 will be displayed as a red triangle
The online search facility will only allow searches back to approximately 1990. Applications prior to this date will need to be requested from the Planning Department, for which there may be a charge for officer time. Email planning@braintree.gov.uk for more information.
5. Once you have identified a record of interest, click on the triangle point or polygon to display a summary of the information about the record.
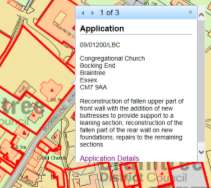
If there is more than one record associated with the property, you can click on the navigation arrows to page through the record summaries.
To view the full record details click on the Application Details link at the bottom of the window.
Saving Map Searches
You can add a map search to your Saved Searches list in one of two formats:
- Rectangular Search - saves all of the records of the selected record type that apply to the area currently shown on the map
- Circular Search - saves all of the records of the selected record type that apply to the area within a specified radius of the map centre.
Rectangular search
The rectangular search allows you to display occurrences of a record type over the geographical area currently displayed on the map. By re-running the search, you can monitor new occurrences. For example, if you have zoomed the map to display your town centre and filtered the legend to display planning applications in the last month you can save an extents search that allows you to monitor new applications arising in the town centre on a monthly basis.
1. Zoom and pan the map to display the geographical area of interest.
2. Select the required time period.
3. Click on Save a rectangular search.
4. On the Saved Search Options page you may change the default search title if you wish.
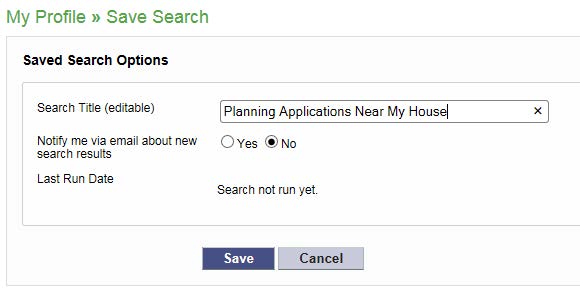
5. If you want to be notified by email of any new records matching your search criteria, select Yes. These notifications are displayed in your Notified Applications tab (see “Viewing Your Notified applications”).
6. Click Save to save the search to your list of Saved Searches (see “Viewing Your Saved searches”).
Circular Search
The circular map search allows you to display occurrences of a record type over the geographical area currently displayed within a specified proximity of the centre of the map. By re-running the search, you can monitor new occurrences. For example, if you have zoomed the map to display your home and filtered the legend to display planning applications submitted in the last year you can save a proximity search that allows you to monitor new planning applications arising within a specified distance of your home on a yearly basis.
1. Zoom and pan the map, placing the geographical point of interest at the centre.
2. Select the required time period.
3. Select the distance for which to search for records.
4. Check the Show on map box to display the proximity as a circle around the centre. You can pan the map to make adjustments if required.
5. Click on Save a circular search.
6. On the Saved Search Options page you may change the default search title if you wish.
7. If you want to be notified by email of any new records matching your search criteria, select Yes. These notifications are displayed in your Notified Applications tab (see “Viewing Your Notified applications”).
8. Click Save to save the search to your list of Saved Searches (see “Viewing Your Saved searches”).
Viewing your Search Results
Once you have run a search, a list of records matching the search criteria is displayed.
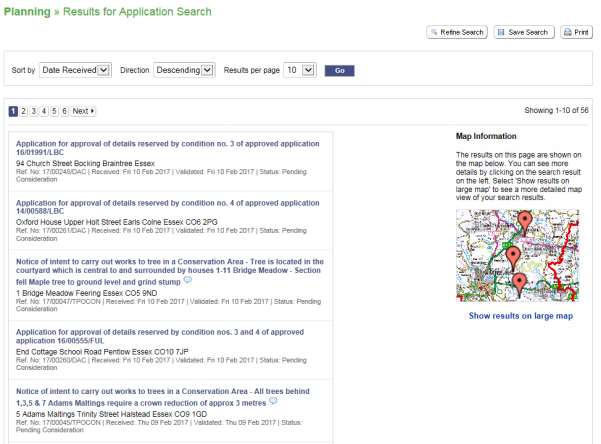
A speech bubble icon attached to a record indicates that comments may be made about that record at this time
1. You can manipulate how the search results are displayed to help you find applications of particular interest:
- Sort By - re-order the results according to a selected criterion
- Direction - choose whether the results are displayed in ascending or descending order
- Results per page - choose how many results should be displayed on the page at once. When you have made your display selections, click on the Go button.
2. The number of results displayed (out of the total number of results) is shown. If there are more results than fit on to one page you can navigate between the results pages either by clicking on Next to view the next page or Previous to view the previous one, or by clicking directly on the page number.
3. A map of the relevant area is displayed. Click on Show results on Large map to see the locations of the search results in greater detail (see “Map Search”).
4. If there are too many results, or if the results do not contain the applications you are looking for, you can go back and amend your search criteria. Press the Refine Search button.
5. To display the current page of search results in a printable format, click on the Print button. Click on Print again in the new window to send the page to your local printer. Press Close when you are finished with this window.
6. To view an individual record in detail, click on its title (application description).
Saving a Search
You may find that you use a particular search regularly. For example, carrying out a simple search based on your post code or an advanced search showing all applications within your parish boundary. As a registered user you can save these searches to be run again from your Saved Searches page (see “Viewing Your Saved searches”). Additionally, when new records corresponding to a saved search arrive, news of these will automatically appear on your Notified Applications page (see “Viewing Your Notified applications”).
1. To save a search, click on the Save Search button.
2. Change the default search title if you wish.
3. If you want to be notified by email of any new records matching your search criteria, select Yes.
4. Click on Save to save the search.
Tracking Applications
Any application can be tracked so that you can keep up to date with its progress without having to search for it again. These cases are listed in your Tracked Applications page (see “Viewing Your Tracked Applications”).
1. If you want to add a case to your Tracked Applications page click on the Track button.
2. To find this case again, select Tracked Applications under My Profile.
3. To stop tracking an application, return to the application details and click the Stop Tracking button at the top of the page. Alternatively click the Stop Tracking button next to the application in the Tracked Applications page.
Viewing Saved Searches
Searches that will be performed frequently can be saved so that they may be repeated easily as often as you like (see “Searching”).
Any changes to the status of applications previously found by your search criteria or any new applications which match the criteria of a saved search will trigger a notification. Notifications are listed in the Notified Applications page.
1. To view your saved searches, select Saved Searches from the My Profile drop down list.
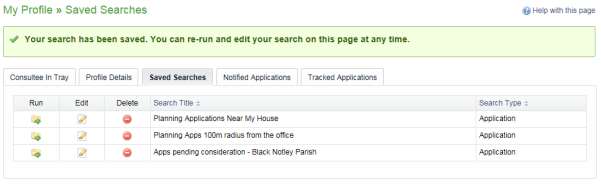
2. You can sort the list by clicking on the appropriate column headings:
- Search Title - sort the list alphabetically by search title
- Search Type - sort the list alphabetically by search type.
3. To perform a saved search now, click on the Run button for that search. Please Note: Circular map searches cannot be run from the Saved Searches page.
4. To modify the search criteria, click on the Edit button for that search. This returns you to the appropriate search form and allows you to change the details of the search.
5. To remove a search from the list, click on the Delete button for that search.
Viewing Tracked applications
After locating an application of interest by searching, you can choose to keep a watch on what happens to it by tracking it. Applications are displayed on the Tracked Applications page. When applications that you are tracking are modified a notification will appear on the Notified Applications page and you will be sent a notification email.
1. To view these applications, select Tracked Applications from the My Profile drop down list.
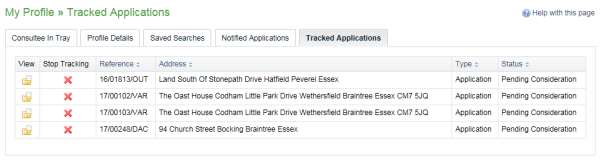
2. You can sort the list by clicking on the appropriate column headings:
- Reference - sort the list alphanumerically by reference
- Address - sort the list alphanumerically by the address that is the subject of the application
- Type - sort the list alphabetically by the application type
- Status - sort the list alphabetically by the status of the application.
3. To view a tracked application, click on the View button for that application.
4. To remove an application from the tracked applications list, click on the Stop Tracking button for that application.
Viewing Notified applications
When applications that are the subject of a saved search or those in your Tracked Applications list are modified, a list of those applications will appear in the Notified Applications page. You will also be sent a notification email.
1. To view your notifications, select Notified Applications from the My Profile drop down list.
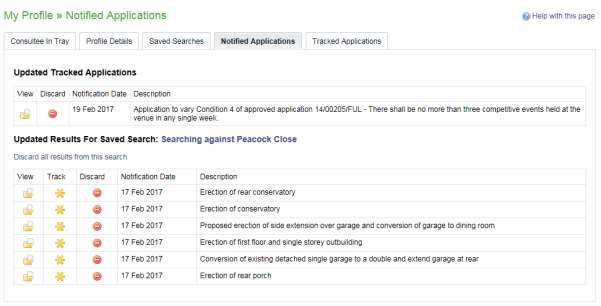
2. The tracked applications that have been modified are listed at the top of the screen. These are followed by the modified applications that are subject to your saved searches.
3. To view an application, click on the View button for that application.
4. To remove an application from the notifications list, click on the Discard button for that application. To delete all of the notified results for a particular search, click on Discard All Results From This Search.
5. Additionally, you can select saved search applications from the notifications list and track these. Click on the Track icon for the applications of interest. These will now be added to your Tracked Applications page.